Muscle Length Training at the Workplace -
Is Sitting the New Trend?
Many people sit too much in daily life – with health consequences. According to the DKV Report 2023, we spend an average of over 9 hours sitting on workdays, and the trend is rising. But why is this so unhealthy?
The Effects of Sitting
Raising Awareness of Lack of Movement
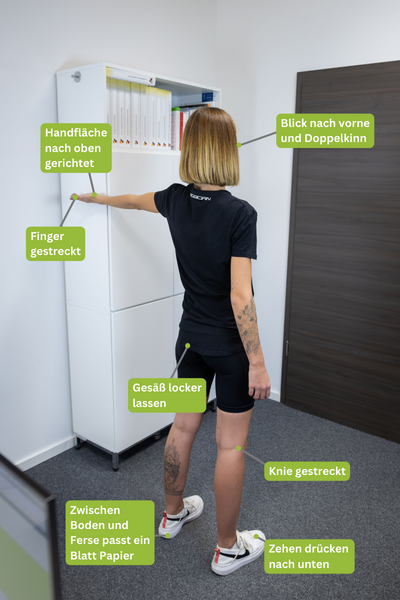
Hip Flexor
The hip flexor (M. Iliopsoas) consists of three muscles: M. psoas major, M. psoas minor, and M. iliacus. Its main task? Hip flexion – especially active when sitting, whether on a chair, bike, or in a car.
Sitting for long periods keeps the muscle in its comfort zone. When standing up or walking, it has to stretch. If shortened, maintaining an upright posture is difficult. Regular stretching and movement help prevent shortening.

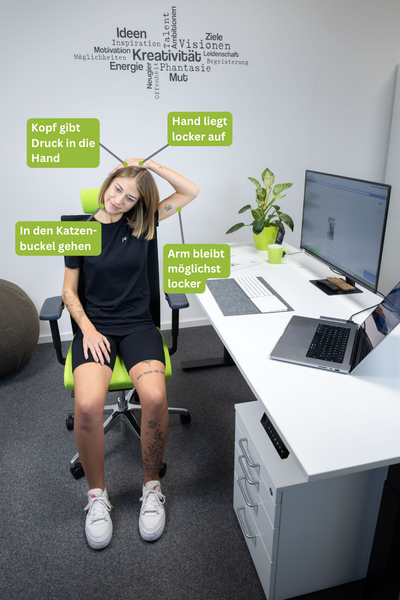
Chest Muscles
Many activities like writing, cooking, or stocking shelves are done in front of the body. This causes the chest muscles to tend to shorten over time. A sign? Difficulty in rolling the shoulders back or bringing the shoulder blades together. Is this the case for you? Then targeted stretching exercises might help.

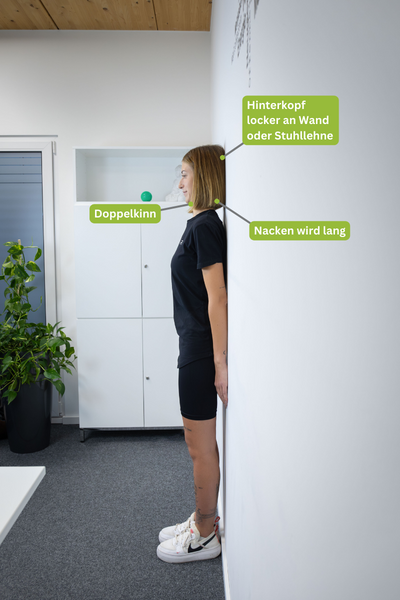
Neck and Cervical Muscles
After extended PC work or a forward-leaning posture, the neck often feels stiff. Movements like turning or rotating the head are difficult because the head is often not properly aligned. Frequently, the head drifts forward throughout the day, leading to tension. An ergonomic workspace setup, such as a correctly aligned screen and regular breaks, can help prevent neck discomfort.

Note:
You can also perform the exercise standing in a doorway. The advantage is that you have better support if you lose your balance. Alternatively, gently holding onto a table edge is possible, which provides additional security.

Distinguishing the exercise from an arched lower back:
During this exercise, you might suspect that you are arching your lower back. But the exact opposite is true. As the images show, when arching the lower back, the pubic bone drops below the body, and the tailbone lifts. In this exercise, however, the tailbone drops below the body and the pubic bone lifts, which is the exact opposite of an arched lower back.